Monday, September 19, 2011

New Wall Calendars

I seem to be on a never ending (trial and error) mission to get organized.  Not too long ago I made a little message board to put next to my wall calendar.

It worked, somewhat, but it really just look horribly cluttered on my wall once it was filled up.   Plus, I need to have two months up so I can see easily what is going on in our lives: everyday, school and work trips.
Did I make something?  NO!  I sold out and headed to the local Wal-mart for these dry erase boards!  (Something similar to this.)  My craftiness only goes so far, people!
Click on picture to view larger.  Sorry for the glare!
I also had to figure out a way to rotate the boards.  I didn't want to constantly be rewriting on two boards each month.  Grabbing some Command Picture Hangers as an impulse purchase, I figured it was worth a try.  They work brilliantly! Now, I only have to erase one board a month and can still have them in right to left order (for my poor little anal-retentive mind).  I do need to grab some different colored markers so I can have everything color coded.  I am DETERMINED that I will not forget about pajama day at school this year!

Friday, September 16, 2011

Neglect

**COUGH**COUGH**
*HACK*

So.  Have you noticed the neglect of my poor little blog space?  I know - it's completely shameful!  I feel the need to come in here and clean out the dust and cobwebs I've been gone so long.  I (naively) thought with school starting I would have all this extra time on my hands.  I mean, I ONLY have 3 kids to take care of during the day.  One who still naps!  Sadly, I haven't even taken the time to look at anybody else's blog lately, either.  

Honestly, I have been busy with projects.   Several new posts will be showing up soon.  For some reason, all my projects seem to be BIG with LOTS of layers.  I tend to lack the energy (a.k.a. willpower) to sit at the computer and type up a post at the end of the day.  Once again - S.A.D.

Just know I'm back and look for regular posting to resume on Monday.  Have a great weekend!

Friday, August 19, 2011

A Bouquet


In honor of our first week of school, here is a bouquet of freshly sharpened pencils just for you!  May my kids' enthusiasm last the whole year! (HA!)


Tuesday, August 9, 2011

Kid's Reversible Water Bottle Cozy

I did this little tutorial up for Crystal over at Fussy Monkey Business last week.  Now posted here for you crafting pleasure.


What you need:
Fabric A:
1 piece - 6" x 2"
1 piece - 6" x 2 1/2"
2 pieces - 4 1/2" x 2 1/2"

Fabric B:
1 piece - 6" x 2"
1 piece - 6" x 2 1/2"

Elastic:
1 piece - 1" wide cut 2 1/2" long

Ball Point Sewing Machine Needle  (needed later on in the tutorial)

Seam Allowance is 1/4 inch unless otherwise stated.

You will also need your usual sewing notions, iron, sewing machine, pins, ect.

Let's get started.

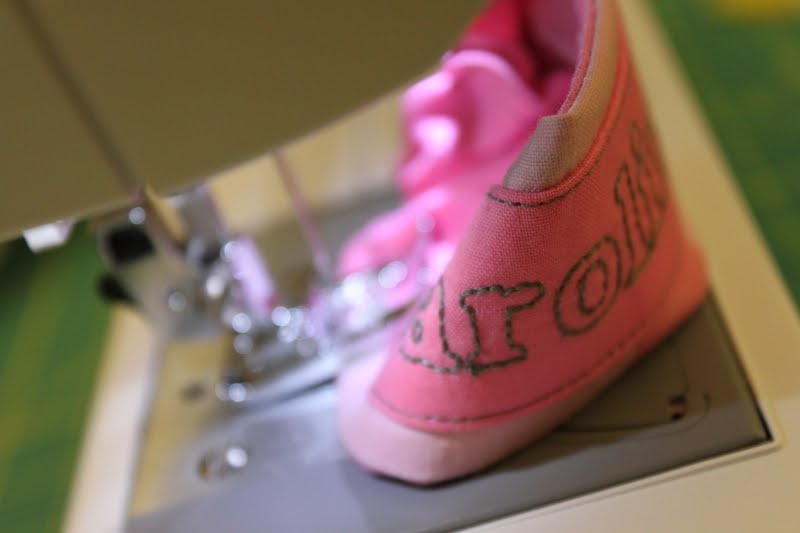
First things first - if you decide to do some machine embroidery to decorate your bottle cosy, you might want to do that prior to cutting your fabric.  I think this was the second time I've actually used the embroidery setting on my machine, so I am nowhere good enough to use a small piece of fabric in the hoop.  If you are doing the decorating by hand, feel free to add it whenever it is easiest for you.

Here is mine.

Once you have your pieces cut, take the 6"x2" fabric pieces of both fabric A and fabric B and iron down 1/2" on both sides (lengthwise) of both fabrics.  (Ignore the stabilizing material you see below.)
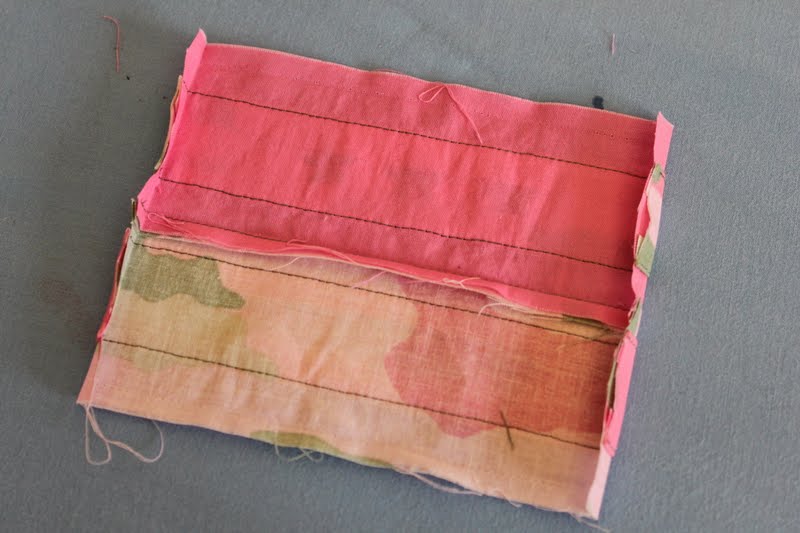
Next, pin these pieces down in the middle of your 6" x 2 1/2" pieces of contrasting fabric.  (A to B and B to A)  Do a top stitch along both lengths right at the edge of your center fabric.  If you click on the picture below, you can see mine just at the edges.

Put right sides together and stitch along one length.  Then open and press the seam to one side.
Turn your fabric over and press the ends down about 1/4".  (This will make your job easier in a couple of steps.)
Now, put right sides together (again) and stitch down the other length and turn right side out.  Go ahead and press the seams and edges under really good at this point.
Okay.  Now grab those 2 pieces of 4 1/2" x 2 1/2" fabric.  Pin them right sides together and stitch down both lengths.
Turn this right side out,  press the seams and add a top stitch down the seams for a little decoration and to help it stay looking nice.
Now is the time to change your machine needle to a Ball Point Needle.  If you don't, you could end up with some really hairy looking stitching on your bobbin side.  Not Pretty!

Take your little piece of elastic and stick it in the middle of the little tube you just created.  Line it up with one end and place it in the middle.  Stitch this end closed making sure you stitch through the elastic.
Flip it around and do the same thing on the other end.  (The fabric will need to be scrunched down.)
Now, slip one end of your fabric covered elastic piece (until the seam is covered) and stitch it in place.  This is a lot of fabric to put through the machine, so take your time and work it through.  

 Once that is done, stitch the other end just like the first.  It's a tight fit, so once again, take your time.
And there you have it!  One bottle cozy to put on your little one's water for snack time or lunch.  Now no one will be able to say they don't know who that bottle belongs to!

And don't forget, we made it reversible!


Hope you all have enjoyed this.  If you have ANY questions, please feel free to email me.

Once again - Thank you, Crystal, for letting me crash your blog!  And to all you readers out there, come on over and have a look around This Too!.  I would love to have you!

Thursday, August 4, 2011

The Original Scrapbox

Have you seen this before?  I stumbled upon The Original Scrapbox about 2 weeks ago, and I find myself going back to it time and time again to drool over all the products.  When you click on the link above, you will get to see a short video.  The Original Scrap Box is a scrapbooking storage system with fold out table and cabinets for the home.  (Yep, you read that right.  A table!).  It offers shelving, racks, carry totes, ribbon boxes and drawers.... I mean, could it get any better?!

It blows my mind!  Of course, I look at it and think how much cleaner my craft room would look.  I think this is the one ...

The Workbox: Vanilla Raised Panel Craft Storage Furniture

Although, this one looks really nice, too.

The Workbox: Knotty Alder Raised Panel Craft Storage Furniture

Both of those are The Workbox, just in different finishes.  See all the bins and pouches inside the cabinet?  It comes with 81 canvas totes in various sizes and 20 clear zippered pouches!  No extra buying.

Of course, in my mind, I would also 'need' this -
The Minibox: Vanilla Raised Panel Craft Storage Furniture
All the totes and pouches are included with this one as well.

There are other products available. Like this.

The CraftBox: Vanilla Raised Panel Craft Storage Furniture


Or this.

The EZ View: White Craft Desk Craft Storage Furniture


There's even a Sewing Box for those of us who sew.  And a Paper Tower for storing, you guessed it, paper.  Although, I think the Paper Tower would also work well for  storing a stash of material.  Or both- I'm equal opportunity.

There are several different accessories available, as well.

I'll give you one more piece of information... Shipping is FREE in the continental USA on several of the products.

Okay..... pick your chin up off your lap and wipe away the drool.  :)  One of these days I'll be posting a picture of my craft room all nicely organized featuring one of these amazing cabinets.  Until then, I'll keep going back to the site trying to decide which finish would look best in my home.

Wednesday, August 3, 2011

Good Couponing Site

Coupon Divas

Just a quick post to let you all know about  Coupon Divas.  There is all kinds of good stuff on this site.  I've been trying to get things ready for our back to school shopping this weekend with our oldest two.  Although it's great to have a tax free weekend for purchasing all the kids stuff,  I also want to make sure I've got coupons to go along with it all.  There is a link just for retail coupons here.  (Check the expiration date on them before printing.)

Also available are 'back-to-school' deals, 'kids eat free' link and so much more on the home page.

Happy Shopping!!

Tuesday, August 2, 2011

Guest Posting: Fussy Monkey Business

Head on over to Fussy Monkey Business today to see my guest post.  While you're there, take a look around Crystal's blog and see some of the amazing things she has going on!


Photobucket

LinkWithin

Related Posts with Thumbnails