You want to know where I got the idea, right? About 6 or 7 years ago, one of my sisters made a bag for me and my oldest child. I LOVE this bag!
I get complements every time I take it out. Unfortunately, I've had a diaper bag slung over my shoulder instead of a purse for the majority of the past 8.5 years. That will change soon enough, though, my friends.
This is the bag she made for my oldest.
Here's the secret behind these bags. They are made out of placemats! Yep. Couldn't tell, could ya? Such an easy project.
Now, I'm not going to give you a tutorial on the bag itself, since there is a perfectly good one right here at JCaroline Creative. I will give you a short tutorial on how I did the ladybug on the front of one bag.
**Any embellishments will need to be done before sewing the bag together if you will be using the machine.**
What you need:
*Sewing supplies - scissors, thread, sewing machine, iron and ironing board, etc.
*2 Fabric colors (mine were red and black)
*Iron-on adhesive - I used Heat n Bond lite - follow the directions that come with whichever brand you get when ironing
*Ladybug printable pattern {I apologize. I can't remember how to put it on my website, so you will have to get it off of MediaFire. It's 11pm and I'm tired.}
1. Download and print off the ladybug pattern on card stock.
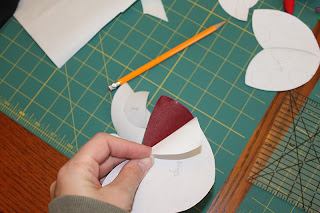
2. Cut out the pattern pieces and trace them on to the paper side of your iron-on adhesive.
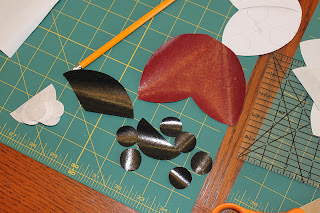
3. Iron the pieces on to the corresponding fabric colors on the wrong side of the fabric. Don't worry about cutting out the individual pieces - you will do that in the next step.
4. Cut out each of the pieces of your ladybug.
5. Peel the paper backing off the fabric.
The shiny side will now stick to whatever you are embellishing.
6. Do a dry run. Place all the patten pieces on the front of the bag (shiny side down) making sure to leave room for seams. Also, take the time now to make a mark down the wings with an air or water soluble marker, if so desired.
7. Leaving the head and body pieces in place, remove the wings carefully. Iron down both the head and body. Place the wings back on the body and head and iron in place.
8. Do a dry run with the spots. You can always leave the line off and keep all the spots whole. However, if you choose to have overhang, now is the time to trim the spots before ironing them down. Once you have them the way you like, iron them down.
Stitch in this order - antenna (starting at the head and moving out), head, body
all spots - notice I did not stitch all the way around the spots that were trimmed. You don't want to have a doubled up stitch.
Lastly, you will stitch down the wings. Start right behind the head down the center of the wings flowing all the way around. This will give you one long continuous stitching.
There you have it! Once you get the hang of it, it goes pretty quickly. The spots are more of a challenge, but can be done. This gives such a nice finished look to your project.
Any one, young or 'old' would be please with such a gift!


I know this has been up for a while but thank you for posting this. Was needing some ideas for appliques for a ladybug quilt I'm doing and this fits the ticket!
ReplyDelete